Tuesday 28 February 2012

February's Painting Results

Another month has been and gone! Let's have a look at what I managed to get painted then...

To refresh your memory (or if you didn't read the previous posts, to just tell you), my targets for this month were to paint the first unit for my Saga Normans, and to paint the first bits of my Very British Civil War force, the Handsworth Volunteers. In keeping with my resolutions, I also needed to complete a wild card of some sort.

As I've reported in previous posts, I got the Normans and Volunteers done without too much trouble:


This left me some time to move onto wildcards, but not a lot - I lost a week to a last minute work trip abroad (not that I can complain too much about a free trip to 25 degree sunshine in February!) but I had a definite plan for what I wanted to do, and I stuck to it.

At the moment, I'm very keen on the British Civil War idea, and I picked up some extra pieces for this at Vapnartak. This included a few Great War Miniatures packs, so I started painting those. I'm intending to use these mostly as a new faction for VBCW, allied to the Handsworth Volunteers, called the Swallownest Socialist Briade. There'll be more on them in another post, but for now here are the models I got painted:

Death from afar in the form of a sniper

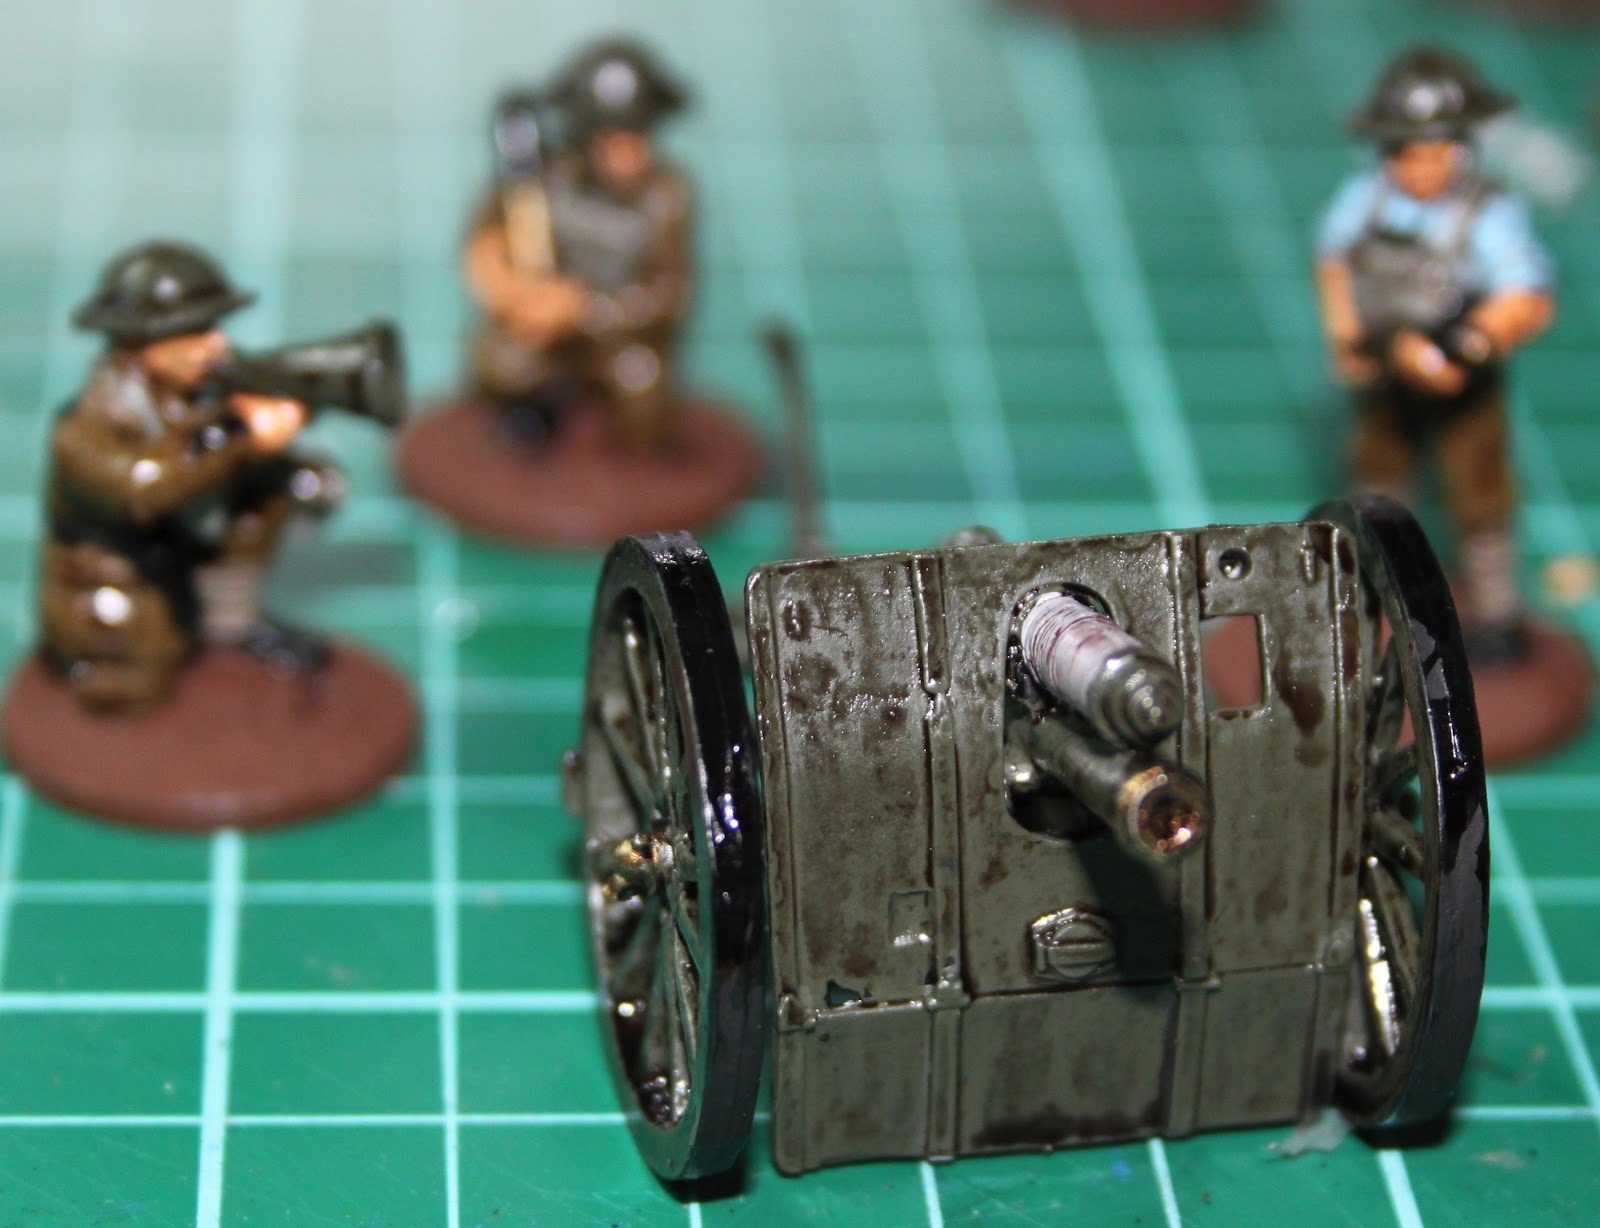
18-Pounder Artillery Piece - that should show those fascists a thing or two!

Artillery Crew at the ready

Spiritual support in the form of a chaplain

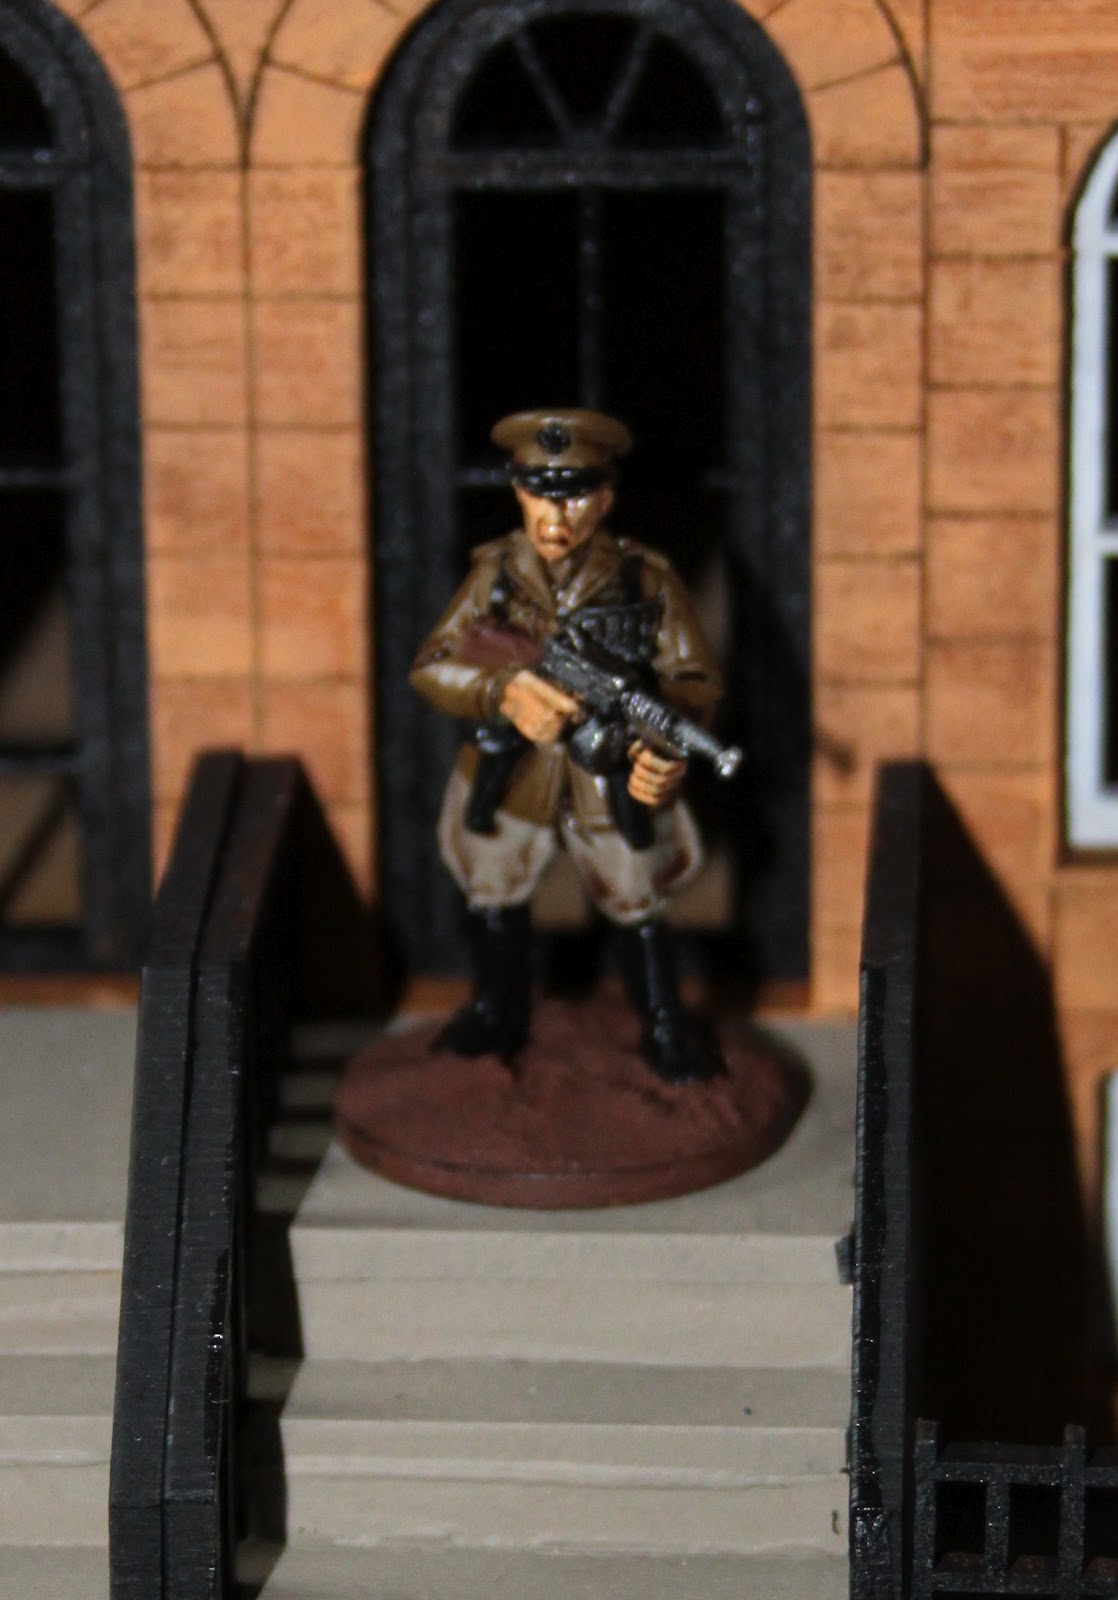
Officer with a shotgun - this model will probably lead the Swallownest Socialists

A Tommy with a football!


I also did some minor conversions to create a unit of cavalry for the Handsworth boys...

Ready for the charge


These are some Perry French Dragoons, which I also got from Vapnartak at the bring and buy tables (the chap selling them had them listed for £10. I asked if they were complete, and he said they were except for the bases. He didn't let me say the words "that's ok, I'll be using different bases anyway" before he lowered the price to £8...).

To try to match the Handsworth Sword Dancers' uniforms a bit better I cut the hilt guards off the swords, and used some heads with German WW2 forage caps, having cut the peaks off the caps. It's a fairly simple change but I'm hoping that with the painting done it won't be too obvious.

With all the VBCW I've done so far there's a bit more I'd like to do to really finish them off, but I wanted to get them ready for a game on Thursday so I'm happy that they can be used for that now.

There's also another VBCW unit I've done this month but I'm not showing here - this will be a surprise on the table on Thursday night...

As March is about to start I also need targets for that.  Seems best to keep with what I'm interested in at the moment, which is Saga and VBCW. So, targets are to paint the Sword Dancer cavalry, build some Sword Dancer infantry, and paint another unit of Normans. As always there should be another wild card as well!

Saturday 18 February 2012

A quick Norman update

Not too much to report, but in amongst other jobs I managed to grab enough time to base the Normans from my last post. They still need some flock and varnish, but I thought it worthy of a quick photo:

Charge!

As with my Anglo-Danes, I'm using colour coding on the bases to tell the different unit types apart. These are warriors, so have the edges of the bases marked in blue. By using the same colour scheme as I did for that force, I'll be able to use Anglo-Dane models as proxies until I get all of the proper Normans done - which is likely to be necessary with the WFC Saga campaign kicking off very soon...

Wednesday 15 February 2012

This is Norman, that's Norman, and have you met Norman and Norman?

February is the shortest month, so I was cutting it fine by giving myself the target that I did - to paint my existing Very British Civil War force, the Handsworth Volunteers, paint a unit for my new Saga Norman army, and add some sort of wild card too.

Well, you can see the Handsworth Volunteers posing in the last update - they need varnishing, and I'd like to touch up a couple of places, but I'm happy that they're done.

And now, for your delectation, a unit of Normans!

That "they're all called Norman" joke might be weak, but it's basically compulsory

The more eagle-eyed and Saga-rules-aware of you will have spotted that there's actually nine models here, and a unit need only be eight. There just happened to be an extra one on the desk as I was painting and he got swept along in the crowd. You'll also notice that so far they aren't based - that and a little more shield detail is all that remains on them, but I'm pleased with how they're looking now.

This leaves me just the wild card to do, and I already have plans there. With half the month left, things are looking good, but! A note of jeopardy has been introduced in the form of a hastily arranged business trip to Los Angeles next week (it's a hard job but someone has to do it, etc. etc.). This will cost me two weekends and all of the evenings next week, as well as forcing me to rearrange a club game, so things become a little harder again.

I'm enrolled in the Wargamers' Free Company Saga campaign with the Normans, and have a VBCW game planned for the beginning of March, so I'll have to turn something around. Stay tuned to see how I do.

In the meantime though, I'm feeling very good about the new year's resolutions! Don't think I've broken any just yet...

Friday 10 February 2012

The Handsworth Volunteers

In the last post I talked about a game I played recently using my Very British Civil War force, the Handsworth Volunteers. Since we're now tracking our campaign on the Wargamers FC website, I thought it high time I wrote something about the background of this faction.

After the Great War of 1914-18, the few survivors of the Sheffield City Battalion returned home. The disastrous battle of Serre in 1916 had destroyed the battalion and caused the withdrawal of its remnants from the front line, and the men that had seen this were keen to avoid fighting again.

When Moseley's Fascists came to power, and trouble flared around the country, the Great War veterans now living in Handsworth were determined to stay out of it. This was soon to prove difficult though - as the Sheffield Peace Council declared that the city's factories were open to all that could pay for them, Handsworth's position near the edge of the defended city centre meant that trade convoys passed through regularly, drawing attacks from other factions in the area and threatening the safety of Handsworth's citizens. Those men that had travelled to Europe to defend liberty twenty years earlier could not stand for this and, led by George Baxter, made the call for volunteers to defend their homes and families.


Amongst those to answer this call were the Handsworth Sword Dancers, and so the Handsworth Volunteers adopted the locked swords as their symbol to mark themselves as separate from the different forces fighting each other in the area - it was their hope that the symbol would come to identify them as a group who would defend themselves but were not out to attack others.


Unfortunately this was not to be. As the newly formed Volunteers met on Handsworth's outskirts, and distributed the limited weapons and uniforms they had available (a mixture of old equipment they had kept from the Great War, and the few they had been able to scrounge and trade for food with Sheffield), a BUF recruiter knocked on the door of the cottage they were sat in. As she caught sight of the weapons and uniforms she turned to run, and making a split second decision, Baxter placed her under arrest.


The BUF had troops nearby who staged an immediate, yet unsuccessful, rescue attempt. The Volunteers had won their first battle, but had made an enemy of the government of the land in the process.

A few weeks later, they were attacked again by Royal Navy forces moving an armoured column through the area. Despite destroying two of these vehicles, the Volunteers took a mauling, and found themselves with limited manpower and unable to defend Handsworth alone.


George Baxter (who had now taken to wearing an officer's uniform and referring to himself as Brigadier Baxter) looked around for allies in this time of need and found them in the form of the Swallownest Socialist Brigade. As members of the Peace Council, the Communist Party of Great Britain wasn't able to directly take part in fighting in the area. To oppose the BUF, they instead sent weapons, uniforms, and funding to socialist groups in the area, and asked them to take and hold whatever positions they could.

The Swallownest Socialists were therefore well armed, but lacked the experience and leadership to effectively take on the fascists. The Handsworth Volunteers lacked men and weapons, but had the experience and skills to fight. For Brigadier Baxter it was a double edged sword - he could use the Swallownest weapons to protect Handsworth as he had promised, but to keep the Swallownest men on his side he would have to commit to a more aggressive campaign against the right wing factions in the area - putting Handsworth on the side of the left, and possibly bringing more attention to those he had intended to keep out of the fighting.

Friday 3 February 2012

Keeping the roads clear

As promised in the last post, I played a Very British Civil War game last night, using my newly painted buildings. Here they are in a quick snap before we laid out the rest of the terrain:
Notice the door to nowhere halfway up one of them - there's more work to do there to add a staircase to the side of the building, that'll follow in good time. Here they are from the other side, not that they look much different...
These worked really well during our game. 

We were using 40k rules, with some simple stats for the weapons and vehicles and basically treating all but commanders as imperial guardsmen.

There were three factions playing - my Handsworth Volunteers, with a single squad holding the buildings and a roadblock, and two more squads and a commander off the table in reserve (so I wouldn't know where they would come on or when). My troops were there to try to steal some vehicles from...

Brian's Liverpudlian Sailors, who were trying to get their armoured vehicles home to Liverpool from Hull. Along the way they would have to pass the Handsworth Volunteers and also get through...

Kieron's British Union of Fascists, who had their own roadblocks further along the road, lying in wait for the sailors once they had smashed through the Volunteers' barricade, which we all confidently predicted would happen quickly, leaving me to try to get my reserves into position to snatch a vehicle or two where I could.

This view was reinforced as soon as the sailors moved onto the table - Brian had no fewer than six vehicles (in a game with around 20 fighters a side), including a van with an anti-tank gun, and an old offroad-capable Rolls Royce armoured car with a vickers machine gun. 

However, nothing is ever certain, and in the first turn my lewis gun was able to wreck the Rolls, turning it into an additional roadblock and causing the sailors to leap out of their vehicles.

Most of them then started firing up at the Volunteers, causing a few casualties but leaving the lewis gun firing down at them, killing their commander's signaller and wounding the man himself. This machine gun nest would pick off a few more sailors over the course of the game. 
My first reserves arrived nearby and started an exchange of fire with the scouse infantry, but eventually the outnumbered Handsworth squad was wiped out in the woods behind the building. 

By this point the BUF had heard the firefight and decided to send troops to investigate - a van set off from their roadblock loaded with fascists...

... only to be blown to smithereens when my van arrived from the opposite road, and another lewis team disembarked and opened fire, downing all but one of the blackshirt passengers.

My squad then saw its own van detonated by the navy boys' anti-tank rounds, so moved towards the fight by the buildings and opened up on the offending van, hitting its magazine with a lucky shot and blowing it to pieces at the front of the column. 

It was at this point that my commander finally showed up, unwisely appearing next to a large BUF SMG squad, who were easily able to wreck his car, severely wound him, and take him prisoner. 

The sailors weren't too happy either, and sent a squad into the building, suffering a couple of casualties but eventually taking out my machine gun nest there. We ended the game at that point, so the sailors hadn't got very far at all but had now managed to hole up in the buildings, the Volunteers had suffered some major losses but taken out a couple of dangerous vehicles and a fair few of the BUF, and the BUF had captured a prisoner but taken some losses themselves.

There'll definitely be more to come here - this was a very enjoyable game, made more so by the fact that there are no points values, the scenario wasn't at all "fair", and so we all played to have fun rather than to win, and always with an eye to what made more sense in the overall picture, not just this particular engagement. More games like this please!